
Tools for Rehandling

Wood handles are common to most trail tools and are the most common type of replacement handle. Hickory makes the best handles for impact tools because it combines hardness and stiffness with excellent resiliency. For bent handles or simple handholds, ash is usually used.
When choosing tool handles, remember that straight grains offer maximum flexibility and strength. If possible, the grain should also be tight and knot-free, and it should run parallel to the wedge slot. Avoid coated handles. Painting or staining can hide flaws in materials or construction.

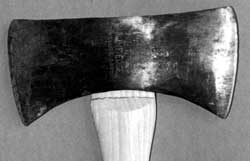
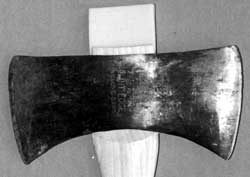
Diagram of the wedge slot and
end grain of ax handles.
The best wedges for securing tool heads are hardwood or plastic. Traditionalists swear that wooden wedges are best, but many new tools are equipped with plastic wedges. Avoid metal wedges for fastening heads to handles; these crush and weaken handle wood and make broken handles difficult to remove by drilling.
Sometimes a handle may need only a new wedge because the handle was not broken but loosened. In this case, carefully drill out the old wedge; remove the handle; clean the slot; and replace the handle on the head.
Plastic wedges used for securing
tool
heads.
Wooden wedges are
the
choice
of traditionalists.
Regularly inspect all tool handles and replace any cracked, rough, or badly weathered handles as soon as possible. When a tool needs a new handle, follow this step-by-step procedure. We have selected ax handles as the example for this discussion, but the technique is adaptable to other trail tools:
-
Clear the eye of the tool. To remove worn or broken handles from the
eye of a tool, place it upright in a vise and drill several holes
into the wood from the top. These holes relieve pressure on the wood
inside
the eye so it can be driven out with a hammer and punch. If heads
are epoxy-bonded to handles, soak the head in boiling water to soften
the
bond.
-
Size up the tool and match an appropriate handle to the head.
All handles will need some reshaping by hand to fit the head. Be sure
that the top
of the handle will fill the eye of the tool in both length and width.
- Saw the handle to an approximately correct length. If the handle
was not factory sawed to accept a wedge, remove the head, secure the
handle,
and carefully saw
down about two-thirds the depth of the head.
- Inscribe two perpendicular
centering lines across the length and width of the handle end inside
the eye. You will use them as a guide/check
for centering the
handle in the eye later. Make an additional mark below the head and just
above where the handle broadens to denote the final seat for the head.
- Slowly
remove excess material from the handle using a spoke shave, wood
rasp, or grinder.
- Fit the eye of the tool to the handle. Light tapping
on the tool head will allow repeated removal of the handle without
damaging the wedge
slot. Continue shaving
and fitting until the head rests squarely ¼ to 3/8 inch
above the final seating mark. Make sure that the head is straight on the handle.
- With tool head aligned perpendicular with the handle, draw a line
across both sides of the handle at the final seating mark. Saw a shallow
cut
along these
lines to create a square shoulder. Fit the tool head to rest lightly on this
shoulder.
- With rasp and sandpaper, uniformly backslope the handle from the
perimeter of the handle to where the head finally seats. Carefully
smoothing the
handle just
below the head prevents splintering.
- Use a long tapered wedge that extends
the full width of the slot to attach the head to the handle. Drive
the wedge into the slot, and tap alternately
on the
wedge and the end of the handle until the striking tool bounces off each
with equal force. Use epoxy to fill remaining voids between the handle
and the eye
and seal out moisture.
- After the epoxy sets, trim excess wood flush with
the top of the head. A hacksaw works best here because the blade will
not be dulled by
the metal, and because
the saw blade can be turned 90° on the frame.
- Remove any varnish or paint
from the handle. A light coating of raw linseed oil regularly applied will
protect against drying and cracking. Some woods
workers
recommend drilling short holes in the base of the handle and periodically
filling them with linseed oil. The oil penetrates the entire handle through
natural pores
in the wood.
A loose handle can be temporarily tightened in the field by soaking the head in water or linseed oil. The wood in the head swells to accommodate the fluid and fits tighter in the eye. Make permanent repairs as soon as possible.
Handles may also be shaved to fit individual grips more comfortably to reduce impact shock and hand and arm cramps. When shaving handles, proceed slowly and carefully; it is better to remove too little wood and have to trim again than to remove too much and have a weak or unusable handle.

A—Size up the tool head and match it to the handle.
Note that the handle
protrudes excessively
long through the head. Scribe it to be cut off.

B—Saw the handle to about the correct length.
The handle has been
roughly fitted so the
head slides to within about ½ inch
of the final
seating position.
C—A line has been scribed below the roughly-fitted
handle.
The
line denotes the final shoulder upon
which
the head sets.

D—The tool head has been snug-fitted to the
square
seating shoulder. Note that there is
about½ inch
excess handle above the head.
E—All surfaces just below the handle should be
sanded
smooth before
the head is placed to
insert the wedge.
The wedge has been
started in
kerf.

F—The wedge has been driven home with the
alternate
driving of
the wedge and the end of
the tool handle.

G—Use a hacksaw to trim off
the excess
handle and
wedge
flush with
the tool
head.
Turn
the saw
blade 90° on the
frame
to facilitate
the flush cut.

H—The finished mounted tool. The handle
can be finish-sanded
and
oiled with raw
linseed
oil to protect against moisture.