
Dam Problems Continued
- Seepage Water Exiting at the Abutment Contact
- Seepage Water Exiting From a Point Adjacent to the Outlet Pipe
- Failure of Concrete or Rock Outfall Structures
- Outlet Releases Eroding the Toe of the Dam
- Excessive Vegetation or Debris in the Spillway Channel or Around the Inlet
- Erosion of Spillway Channels
Seepage Water Exiting at the Abutment Contact
Probable Causes and Possible Consequences
- Water flowing through pathways in the abutment or through the embankment can cause seepage.
- Seepage can lead to erosion of the embankment material and dam failure.
Recommended Action
Report the suspected problem to the appropriate Federal or State agency official immediately.
- Study the leakage area to determine the quantity of flow and extent of saturation.
- Inspect for developing slides daily.
- Have a qualified engineer inspect the condition and recommend further actions.
- To ensure embankment safety, water level in the reservoir may need to be lowered.
 Figure 29—Seepage exiting at the abutment contact (groin). |
 Figure 30—Seepage at the abutment contact (groin) can lead to dam failure. |
Seepage Water Exiting From a Point Adjacent to the Outlet Pipe
Probable Causes and Possible Consequences
- A break or hole in the outlet pipe or poor compaction
around the pipe allows water to flow and creates a
pathway along the outside of the outlet pipe.
- Continued flows can lead to embankment material erosion and dam failure.
Recommended Action
Report the suspected problem to the appropriate Federal or State agency official immediately.
- Thoroughly investigate the area by probing and/or shoveling to determine cause.
- Determine if seepage is carrying soil particles (muddy water).
- Determine quantity of flow.
- Have a qualified engineer inspect the condition and recommend further actions.
- If flow increases or is carrying embankment material, the reservoir level should be lowered until leakage stops.
- Investigate the embankment along the alignment of the spillway pipe if there are any signs of settlement or sinkholes.
 Figure 31—Seepage water exiting from a point adjacent to the outlet pipe. |
 Figure 32—Piping of water alongside an outlet pipe. |
Failure of Concrete or Rock Outfall Structures
Probable Causes and Possible Consequences
- Excessive side pressures on a nonreinforced concrete
structure or poor concrete quality can cause failure of the
outfall structure.
- Too steep of a slope can cause rocks to roll down the hill
and partially block the outlet.
- The embankment may be exposed to erosion by outlet releases because of loss of an outfall structure.
Recommended Action
- Monitor a typical dimension (such as "D" shown in figure
33) to check for progressive failure.
- Repair by patching cracks and supplying drainage
around the concrete structure. The entire outfall structure
may need to be replaced.
- Repair the slopes and place riprap to stabilize them.
 Figure 33—Failure of a concrete outfall structure. |
 Figure 34—Rock failure around an outlet pipe. |
Outlet Releases Eroding the Toe of the Dam
Probable Causes and Possible Consequences.
- The outlet pipe may be too short and cause a scour hole.
- No energy-dissipating pool or structure at the downstream end of the conduit can cause a scour hole.
- Erosion of the toe of the dam makes the downstream slope too steep and causes progressive sloughing.
Recommended Action
- Extend the outlet pipe beyond the toe (use the same size
of pipe and material). Form a watertight connection to the
existing conduit.
- Stabilize the slope.
- Use riprap over suitable bedding to protect the embankment.
 Figure 35—Outlet releases erode the toe of the dam. |
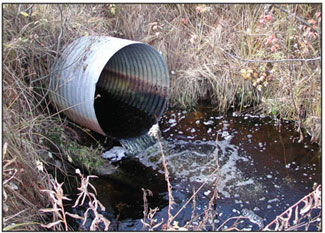 Figure 36—A scour hole at an outlet erodes the toe of the slope. |
Excessive Vegetation or Debris in the Spillway Channel or Around the Inlet
Probable Causes and Possible Consequences
- An accumulation of slide materials, dead trees, excessive
vegetative growth, etc., in the spillway channel can
reduce waterway capacity.
- Reduced discharge capacity may cause the spillway to overflow and the dam to overtop. Prolonged overtopping can cause dam failure.
Recommended Action
- Clean out debris periodically and control vegetative growth in the spillway channel.
- Install a log boom in front of the spillway entrance to intercept debris.
 Figure 37—Excessive vegetation or debris in a spillway channel. |
 Figure 38—A blocked spillway channel may cause overtopping of the dam. |
Probable Causes and Possible Consequences
- Surface runoff from intense rainstorms or flow from
the spillway carries surface material down the spillway
causing continuous troughs.
- Livestock traffic creates gullies where runoff flow can
concentrate.
- Unabated erosion can lead to slides, slumps, or slips, which can result in reduced spillway capacity. Inadequate spillway capacity can lead to embankment overtopping and result in dam failure.
Recommended Action
- Photograph the condition and bring it to the attention of the engineer.
- Replace eroded material with compacted fill to repair damaged areas.
- Revegetate the areas if appropriate.
- Install suitable rock riprap to protect against future erosion.
 Figure 39—Erosion channels. |
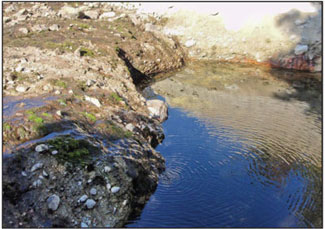 Figure 40—Erosion of the spillway channel may lead to slumps or slides of the spillway sides. |