
Field Work
Turned Around
A legendary Maine guide, so the story goes, insisted that he had never been lost, but he admitted to having been "turned around real good once—for 3 days."
A wetland on an overcast day can easily provide an opportunity to get "turned around real good." Wetland terrain is often featureless. There are no hills, ridges, or rock outcrops, and no obvious slopes. Vegetation is often uniform. If the vegetation is dense and at least 6 feet high, everything looks the same. The problem worsens with fog, rain, or falling snow. Maps and even aerial photographs are useless. There may be no real danger of getting lost. However, it is frustrating and time consuming to lay out a route in the wrong direction or to learn that you are not where you thought you were.
In this situation, a compass is essential. Start using the compass before entering the wetland and before getting turned around. Bring vinyl flagging ribbon and a good sighting compass to the wetland on the first day. Hand-held global positioning systems (GPS) are another way you can keep track of your location (figure 7).

Figure 7—Knowing how to use a compass or
GPS unit will help you
locate the trail.
Sometimes the terrain and vegetation are so uniform you have to mark the general area that the trail will traverse. Using the compass and the vinyl ribbon, flag a straight line route on one particular compass bearing or azimuth. Tie the ribbon at shoulder to eye level. When standing at one ribbon, you should be able to see the next one (figure 8).
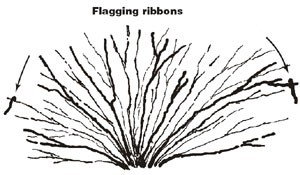
Figure 8—Dense, spreading shrubby plants such as willow and alder
may require two flagging ribbons, one on each side of the plant.
Flag the outer perimeters of the general area wherever they are not obvious. Use different-colored ribbons as needed to help you find your vehicle at the end of the day. Not that you are likely to get turned around, of course.
Trail Layout
Reconnaissance
Reconnaissance (recon) involves walking over the area the trail will traverse and finding the places where the trail must go and the places you would like it to go. For example, there may be only one location where the trail can enter the wetland with minimal construction. This becomes a construction control point. There may be just one or two places where it is feasible to cross a small stream. These become construction control points. One of these points will probably be incorporated in the final route.
What about a location that provides a distant view? This becomes an esthetic control point. A small island in the wetland supports a variety of plant life that is of interpretive value. The island becomes another control point. A view of a sewer plant on the other side of the wetland is something to avoid. That location becomes a negative control point.
Preliminary Route (P-Line)
The trail must be laid out on the ground. The objective is to tie the control points together in a reasonable route, somewhat like connecting the dots, but on a much larger scale. This is normally done with vinyl flagging ribbon.
Few people use striped ribbon, so consider using it to mark the preliminary route. Carry at least two different combinations of colors (red and white stripes and orange and black stripes or other combinations) (figure 9).

Figure 9—Vinyl flagging ribbon comes in
many colors. Striped ribbon
is good for
marking the preliminary route.
If a portion of the route has to be changed, use the second color of ribbon. Do not tear down the ribbon for the first route that appears to be undesirable; it may prove to be better than the alternative route. Tie the new color of ribbon next to the piece of the first color where you want to depart from the first route. The outcome will be a preliminary route or P-line.
Coordination
The layout of an interpretive wetland trail should be a collaborative effort between people experienced in trail construction and those who will be responsible for the interpretation of the completed trail. All parties need to be brought in at the planning and layout stage. The interpretive staff is in the best position to identify interpretive points.
On an interpretive trail, the interpretive points will be among the control points. Routing any trail through all possible control points would result in a long, zigzag trail that would be expensive to build and would look ridiculous. Usually there must be a compromise between alignment, the length of the trail, construction cost, maintenance problems, and the number of esthetic and interpretive control points along the route. One 600-foot length of trail was built near a beaver dam for its interpretive value. Soon, that length of trail was under almost 2 feet of water and had to be rerouted. That location turned out to be a poor compromise.
After agreement on the P-line, the various compliance specialists should be contacted and, if necessary, brought in to walk the route. These may include specialists from your own agency, perhaps others from the U.S. Army Corps of Engineers and the U.S. Fish and Wildlife Service, and cultural resource specialists such as historians and archeologists.
Blue Line
It helps to go back over the P-line and refine it with an eye toward reducing construction problems, views of the trail by other trail users, and views of constructed structures from the trail. Refine the alignment to avoid sharp turns and long straight sections.
Blue ribbon is often a good choice for this more precise line. Blue has proven to be the most visible color in areas of dense vegetation. Spending time flagging the blue line will make the final layout work easier and faster. In some agencies, specific colors of ribbon denote specific purposes. Be sure your blue flagged line isn't going to be confused with a logging unit boundary, for example. Sometimes, because of vandalism and removal of the ribbon, the proposed route should not be too obvious. Solid green or black-and-yellow striped ribbon are usually the most difficult to see against vegetation and less likely to be removed. Sometimes cattle and wildlife chew on the ends of the ribbon. You may be able to locate the flag line by looking for the remaining knots of ribbon.
Final Layout
The designer and one or two assistants measure the route and keep notes (appendix A) on distances and locations and on the lengths of items that will be needed during construction. This information is extremely important for preparing accurate cost estimates, ordering materials, tools and equipment, and determining the size of the construction crew.
Distances are usually recorded by station, an engineering measuring system used for roads, railroads, and utility lines. Traditionally, in this system 100 feet is written as 1+00; 1,254 feet is 12+54. The distances are measured with either a 100-foot or 50-foot measuring tape and are "slope measured" (measured along the slope). Wire flags are marked with the station distance and stuck in the ground at the approximate location that has been measured. Using metric measurements, 100 meters is written as 1+00; 1,254 meters as 12+54.
The trail grade (the slope of the trail route) is measured on the ground between stations and between obvious changes in slope. At most sites a clinometer or Abney hand level is sufficiently accurate for this work. Precision is not as critical for a trail as it is for a road.
Measure the slope as a percentage of grade (the vertical rise or fall in feet per 100 feet of horizontal distance, or meters per 100 meters of horizontal distance) and record it in the notes. Where the route rises, it is shown as a positive or plus grade. Where the route drops, it is a negative or minus grade. Appendix B has slope conversion information.
A crew of three is more efficient than a crew of two for doing final layout. A crew of three is almost essential in areas of dense vegetation. The field notes can be kept on Rite-in-the-Rain waterproof paper and stored in a 4- by 6-inch ring binder (figure 10). A blank form that you can copy is included in appendix A.

Figure 10—This field notebook is a tried
and true technology that
works.
The form shown (figure 11) is 4¼- by 5½-inches or a half sheet of paper. After the workday, remove the notes from the ring binder and leave them in the office or at camp. Normal surveyor's notebooks are awkward for trail field notes—they keep trying to close up and they are difficult to copy.
The field notes should include important basic information:
location, project, date, weather, first and last names of the
crewmembers, job assignments, color of the flagging ribbons,
and the location of the 0+00 station referenced to fixed
objects on the ground. Clear and consistent handwriting and
language skills are important. Standard abbreviations should
be used and the abbreviations must be explained to others
on the crew. Provide a legend for unusual abbreviations.
Sketches and maps are also valuable sources of information.
Eventually, the field notes will get to the office where someone
else may have to interpret them.
What a waste of time it would be to go through all this work and end up with notes that are unusable. Paper is inexpensive compared to the time required to gather this information. Do not write notes too close to each other. When you make an error, put a single line through the mistake. Do not try to write over or erase it. Go to the next line and write in the correct information.
It is critically important to note the colors of ribbon that you used. Trail construction workers will need to know the color of ribbon they will be looking for. Six months after the field layout, even the workers who laid out the trail will not remember what colors were used.
Drawings, Specifications, and Cost Estimates
Regardless of who builds the trail, the field notes must be converted to drawings and specifications that can be used in the office for estimating costs and ordering materials, and in the field for construction.
| Station and distance | Tread width | Sideslope (percent) |
Gradient (percent) |
Notes |
|---|---|---|---|---|
| Pingree Park—Accessible wetland trail. | ||||
| 9/10/97—Sunny, warm. | ||||
| Bob Pilk, Terri Urbanowski, Bob Steinholtz. | ||||
| Red ribbon/red flags. | ||||
| 0+00-35' east of pole/north curb. | ||||
| 0+00 | ||||
| 4' | 25 | 5 | ||
| 0+50 | ||||
| 4' | 30 | 5 | ||
| 0+75 | Enter willow brush | |||
| 4' | 30 | 5 | Heavy brush clearing | |
| 1+00 | ||||
| 35 | 5 | |||
| 1+76 | Intersection with wetland | |||
| 10 | 4 | loop—rt (south route) end willow brush clearing. | ||
| 1+81 | Begin bog bridge/piles | |||
| 0 | 4 | |||
| 2+04 | End piles, begin B.B. on | |||
| 0 | -2 | sleepers | ||
| 2+38 | End B.B./begin turnpike. | |||
| 0 | +2 | |||
| 2+74 | End turnpike/begin B.B. on | |||
| 0 | +2 | sleepers—medium willow | ||
| brush clearing. | ||||
| 3+06 | ||||
| ±10 | 0 | Hummocky/begin B.B. with | ||
| cribbing, some cribbing | ||||
| one side only. | ||||
| 3+58 | Timber culvert: 8' span by | |||
| 4' | 0 | 0 | 4' height | |
| 3+66 | ||||
| 0 | 0 | |||
| 3+86 | River on rt. Suggest 20 lf | |||
| 10 | -1 | of Geoweb in turnpike. | ||
| 4+19 | End turnpike. Begin trail | |||
| on | ||||
| 4' | 0 | +2 | solid ground. | |
| 4+97 | Sta. 4+97 = 1+76 |
The drawings should include the approximate layout of the route, indicating landmarks and major items of construction. A second drawing at a larger scale should indicate by station or distance where these items begin and end. These distances are subject to field adjustment. Several large-scale drawings may be needed to show the whole trail route.
Drawings with construction details will also be needed for cost estimates and construction. These large-scale drawings show the construction materials, their dimensions, how they are put together, and how they are attached.
A specification defining the quality of the materials and craftsmanship must also be written. For a simple project, this information can be included on the drawings. The specification is also needed by the cost estimator, the individual ordering the materials, the crew chief, and the project inspector.
Preparing drawings and a specification may sound like a lot of work, but preparation reduces the questions of the construction crew and the time spent by the designer in the field during construction. Such work also reduces the possibility that the wrong materials could be delivered to the worksite. Written drawings and specifications are essential for contracts. Forest Service employees should follow the format of Standard Specifications for Construction and Maintenance of Trails (USDA Forest Service 1996) and Standard Drawings for Construction and Maintenance of Trails (USDA Forest Service 1996).
If the work is to be done in-house with an experienced crew, sometimes the procedures can be simplified. It is still a good idea to have drawings and written specifications, because they can prevent misunderstandings.
